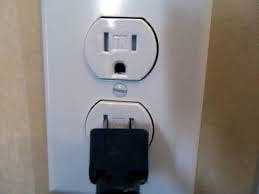
How to Childproof Your Electrical Outlets (Without Sacrificing Safety or Function)
If you’ve got curious toddlers in the house, those knee-level electrical outlets start looking like tiny danger zones. As a master electrician—and a parent—I’ve had plenty of experience keeping little fingers away from live circuits. The good news? Childproofing your outlets is easy, inexpensive, and can be done without compromising electrical safety. Here’s a step-by-step guide on how to childproof your home’s electrical outlets the right way
BLOG
4/14/20252 min read


Step 1: Identify Every Accessible Outlet
Walk through your home at toddler-eye level. Any outlet within reach (generally under 4 feet) should be considered a risk. Don’t forget bedrooms, behind furniture, playrooms, and hallways.
Step 2: Choose the Right Outlet Safety Method
There are several childproofing options, and not all of them are created equal:
A. Plastic Outlet Caps (Basic but Not Foolproof)
• Pros: Inexpensive, quick to install
• Cons: Easy for clever toddlers to remove, pose a choking hazard if pulled out
Best For: Quick fixes in low-traffic areas or temporary protection (e.g., grandparents’ house)
B. Sliding Tamper-Resistant (TR) Outlets (Code-Compliant)
• Pros: NEC code-compliant, built-in protection, no removable parts
• Cons: Requires replacing the entire outlet
Best For: Permanent safety solution, especially during remodels or new construction
Note: As of the 2008 NEC and still required in the 2023 and 2026 updates, tamper-resistant outlets are mandatory in new homes and renovations in many areas.
C. Outlet Covers with Sliding Panels
• Pros: Covers existing outlets, requires adult-sized force to access
• Cons: Bulky appearance
Best For: Renters or anyone wanting a tool-free solution
Step 3: Install Tamper-Resistant Receptacles (The Pro Way)
This is the gold standard if you want a permanent and code-compliant fix.
How to Replace an Outlet with a TR Receptacle:
1. Turn Off the Breaker: Always verify with a voltage tester.
2. Remove the Old Outlet: Unscrew the faceplate and outlet from the box.
3. Note the Wiring: Hot (black), neutral (white), and ground (bare copper or green).
4. Install the TR Outlet: Connect wires to matching terminals: brass (hot), silver (neutral), and green screw (ground).
5. Secure and Cover: Screw it into the box and reinstall the cover plate.
6. Turn Power Back On: Test functionality.
If you’re unsure about wiring, hire a licensed electrician—better safe than sorry.
Step 4: Don’t Forget Power Strips and Extension Cords
Kids love pressing buttons and pulling cords.
• Use power strip covers to block access.
• Avoid loose extension cords.
• Tape cords down or run them through cord channels.
Step 5: Teach and Supervise
Even the best protection can’t replace good old supervision. Start teaching kids early that outlets are not toys. Lead by example—don’t unplug cords by yanking them or leave electronics half-plugged in.
Final Word from the Field:
I’ve responded to more than one call where a toddler stuck a paperclip into an outlet. Fortunately, tamper-resistant designs have saved lives—and they’re now standard for a reason. Don’t cut corners with child safety. A $3 outlet could prevent a lifetime of regret.
ShockTalk: Your Code-Safe Guide
We help electricians, contractors, and DIYers build safer systems with real-world electrical expertise and simplified NEC guidance.
Expertise
Want Tips from a Master Electrician?
Email: info@shocktalk.org
Support Hours: Mon–Fri, 8am–6pm CST
817-716-1579
© 2025. All rights reserved.
